For the past 8 months, I’ve been working on pre-production for a road trip movie that I’m excited to produce. Here’s the trailer, and please consider donating at the GoFundMe below.
The version of Windows that Microsoft should sell you, but won't
Ah, Microsoft Windows. You, paragon of maturity. You have evolved well over the past 45 years. You run on a vast variety of hardware. You can run software from the 1980s alongside Cyberpunk. You can run on tablets and mainframes and weapons of national defense. You have the bones of an incredible operating system with unmatched versatility.
But – please don’t take this the wrong way, Windows – you suck to use. Your parent company has decided that you are a bunch of things which you are not good at being: an ad delivery platform, an avenue for pushing new products, an ever-changing user experience. Windows, you have been around for 45 years! You suck at being an ever-changing experience. You just don’t have it in you! You are mature, and you do many things very well already. When stripped down to your essence, you are elegant, performant, – and yes, even beautiful.
I know that you are those good things because over the past few months, I have seen a different side of you; a side without ads or bugs or Copilot. Fortunately, Microsoft publishes a version of you as Windows 11 IoT Enterprise LTSC. It’s not meant for home users, but it should be. The idea is that it’s a version of Windows that only gets feature updates every three years. And because it’s billed as the most stable version of Windows, for Enterprise devices that need to go up to ten years between feature updates, it is immune to short-sighted product decisions by growth-hacking PMs, CEOs, and techbros.
I not only have to thank Microsoft for publishing this version of Windows, but also for neglecting to patch bugs in Windows activation that have existed for over a decade. Microsoft only officially licenses IoT Enterprise LTSC for large corporations, but fortunately anyone can activate it with the same unofficial methods as consumer Windows. Furthermore, the community has written scripts and guides that be used to download, install, and activate LTSC in less time than it takes to install and license Windows 11 by official means.
This is the version of Windows that I wish Microsoft was selling to home users. It’s lean and reliable. And it’s fast. It makes ultralight portables grow wings and fly. I was about ready to toss my laptop – a Dell 5290 2-in-1 from 2018 with a genuine Wacom pen display in a detachable tablet form factor. LTSC makes it run like new again. I’m typing this on it right now.
LTSC is a joy to use on my desktop as well. I haven’t found a single Windows app that doesn’t run. Just earlier today, I was editing the upcoming pitch video for Mile 15 in DaVinci Resolve and found myself appreciating having a computer that doesn’t treat me like the growth generator.
It feels incredible that something like this can even exist. There are countless third-party utilities and sketchy PowerShell scripts out there that tap into your consumer registry and claim to enable an oasis of computing without irritating grafts of Rot Economy bullshit attached. Those aren’t perfect, but they are popular. Meanwhile, LTSC doesn’t reduce the amount of telemetry that Windows produces, but it does do away with most of the other stuff that those tools require hacky workarounds to clear out.
I absolutely love the essay by Edward Zitron that I linked above. To quote: “I do not believe the majority of people hate technology, but what the technology industry has become in search of growth. In fact, I’d argue that deep down, many people love technology — we love that we can instantly connect to friends using little computers in our pockets, or that we can share photos or videos with effectively anyone with an internet connection.” According to Zitron, it is worth negotiating for yourself against the tech industry’s pursuit of growth, in all of the small ways that you can, and he has some good suggestions! I am suggesting another one in the form of Windows LTSC, for as long as Microsoft will let regular people use it. It’s refreshing to use in a way that feels almost radical. Imagine it: a software product made by one of tech’s biggest companies that just does what it says. It exists! I’m reporting to you with it right now!
So, Windows: I’m glad there’s a version of you that doesn’t suck. It gives me the power to refuse Microsoft’s attempts to extract more value from me through my interaction with you. And now, using the computer is just a bit more fun again.
Hurrah! Typing accents with a US keyboard has never been easy with Windows. But a custom keyboard layout by Andrew Dunning makes it as easy as it is on a Mac.
In the 1980s, Apple noticed that many European languages only need a few extra characters compared to English, and since has made typing those with a US keyboard a first-class experience in macOS and iOS. This makes it easy to type words or names containing accents – especially useful in a bilingual country such as Canada! Microsoft meanwhile requires you to type in either one language or the other at a time, or use workarounds like the on-screen character picker or unicodepoints (all of these are slow).
Fortunately, Microsoft publishes a custom keyboard layout editor for Windows. And furthermore, someone has used that editor to replicate the typing experience from macOS. Using the installer above, you can add a “United States-Macintosh” input language to Windows. With that activated, you can use the right Alt key to input various accents and letters used in French, German, Spanish, and other Latin script languages. Et voilà, bon taper!
Fixing degraded Promox VE + Intel I350/X552/X557-AT NIC performance after v8 update
I use Proxmox VE on my custom home microserver, Vakt. Upon updating from version 7 to versions 8.1-8.2 a few months ago, I’d noticed degraded performance from the four Ethernet ports on the system, causing additional latency and some packet loss.
Vakt is based on a SuperMicro X10SDV system-on-board. Two 10GBASE-T ports are provided by a “X552/X557-AT” controller built in to the Xeon SoC, and two additional 1000BASE-T ports are provided via an Intel I350-T2 controller.
All four ports were affected, so I suspected a driver regression. And indeed, reverting to kernel version 6.1.10-1 has solved those performance issues until upstream fixes the bug.
Here’s how to do it:
# find available kernels for your system with `apt search pve-kernel`
# I selected pve-kernel-6.1 in this case, which installs 6.1.10-1
apt install pve-kernel-6.1

# 'pin' the kernel
# normally the system automatically maintains the boot config to use the most suitable kernel
# this is telling it to use the old kernel we just installed instead
proxmox-boot-tool kernel pin 6.1.10-1-pve

reboot

# revert the changes with `proxmox-boot-tool kernel unpin && apt autoremove`
# you can see which kernels are installed and whether any are pinned with `proxmox-boot-tool kernel list`
Overview of the Apollo Lunar Module’s guidance computer’s design, functions, input and output, and user interface, presented by Robert Wills and the UK’s National Museum of Computing: www.youtube.com/watch
Now there, it’ll be alright. Halve six medium tomatoes and a red onion. Toss them in plenty of oil, salt, and pepper in a glass tray and put them in the oven at 350°F. Twenty minutes in, place one whole garlic bulb in there too. When the outsides of the tomatoes are crispy (about one hour in), put the garlic aside. Pour the contents of the tray and some water into a blender and blend until smooth. Press the garlic with the side of a knife and find that the contents of the cloves have turned into a paste. Add the vegetable purée, garlic paste, a soup stock of your choice, then more water, salt, and pepper to a pot until the flavour is just the right level of richness for fresh tomato soup. If more richness is desired (unlikely), you can add cow’s or coconut cream. Eat directly from the pot, or from nice bowls with buttered toast and a friend.
(simplified and adapted from this video guide, which shows the steps in more detail. archived from the @_vegan360 account on instagram.)
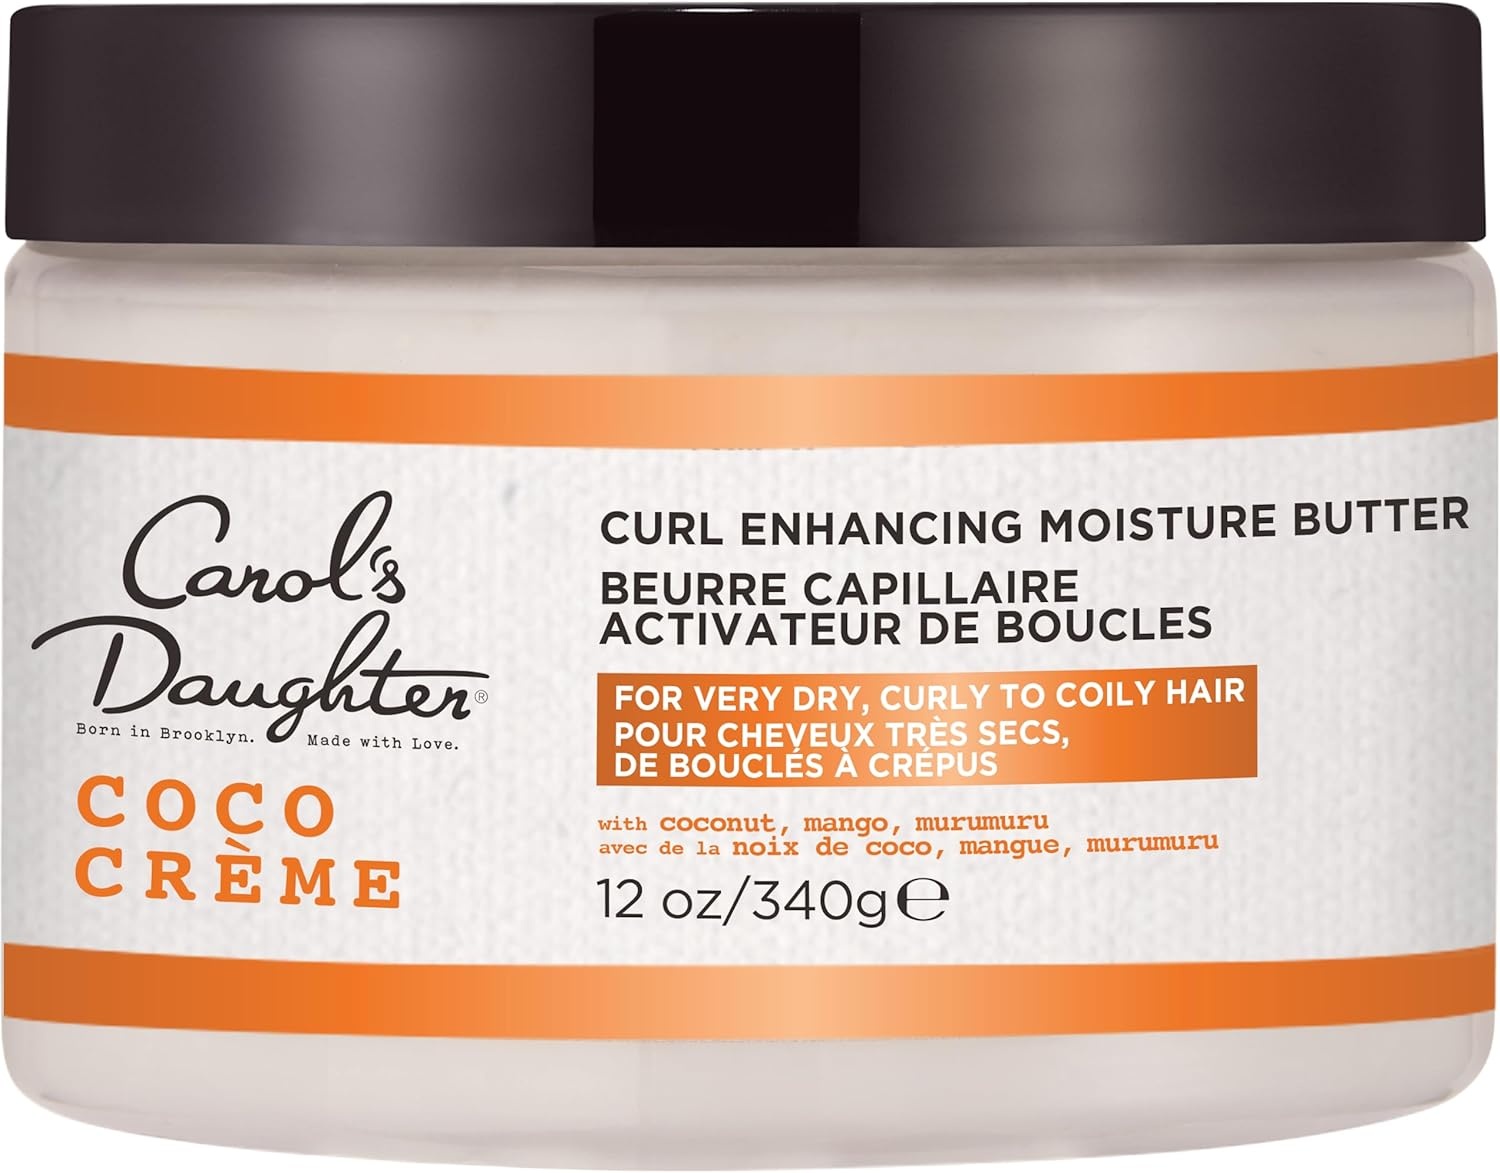
If anyone was, like me, disappointed that Garnier’s Fructis Style Curl Treat Hydrating Butter seems to have been discontinued: Carol’s Daughter Coco Creme Curl-Enhancing Moisture Butter has an almost-identical formula, and for me it worked as a drop-in replacement. In stock at Amazon and Walmart.

Making UHD Blu-ray video discs at home and on the cheap
I charge reasonable rates to make UHD or FHD Blu-ray discs for your video project. Email me at mail(a)benmacphail.ca for more info. If you want to learn how to make them yourself, read on!
For our supporters on the Chicken Surprise Indiegogo campaign who chose a perk including Blu-rays, I had to find a way to make UHD Blu-ray discs at home, and on the cheap. After much trial and error, I came to a process that produces UHD or FHD Blu-ray discs that can be played on commercial disc players. Here’s that process, and how you can replicate it.
First, let’s be realistic about costs here. The costs associated with producing physical media are going up every year, as scales of production lower. The process outlined in this guide also uses some commercial software that costs some money. As of writing, you can expect to spend around $250 CAD upfront on non-consumables (the Blu-ray writer and software, not including the computer you need to run them), and $1-3 CAD per disc.
This guide requires that you have access to both a Windows computer AND a computer running either Ubuntu Linux or macOS. It also assumes you have a basic familiarity with the command line on that Ubuntu/macOS system.
Mac users who do not have access to a Windows machine: all of the tools I talk about here may run fine on a VPS from the likes of AWS, Azure, or your provider of choice; though I have not tested this. You may also want to give UTM a try, which can run Windows on any Mac with decent performance.
This guide also does NOT walk you through the process of creating menus for your Blu-ray disc, nor the process of including more than one video on your disc. However, the same tools we use are capable of doing these things, so go forth and experiment (though I recommend following the guide once through first, to validate that your setup works in the same way mine does).
This guide also specifically pertains to SDR (Standard Dynamic Range) content, as opposed to HDR (High Dynamic Range) content. HDR is still an absolute mess is 2023 and I do not intend to update this guide with any information on it.
The process is similar for both 1080p and 4K Blu-rays, but I’ve noted where the process diverges.
This guide comes with no guarantee of results whatsoever. I was frustrated that no guide of this sort exists elsewhere on the internet, so this is my best attempt at writing one. Don’t call me responsible if by employing any of the information in this guide, your computer explodes, thermonuclear war erupts, the daisies in your front yard wilt, you hurt your pinky finger trying to type a command, etc.
This guide is released under a WTFPL license, version 2.
I’ve linked some useful resources at the bottom of the page. There are probably easier/cheaper ways to generate Blu-ray discs (especially the 1080p flavour, with old tools like Adobe Encore CS6), but this is what I was able to figure out with my skill set and budget.
The basic steps are:
- to assemble your audio, video, menu, subtitle tracks individually
- assemble those tracks into a Blu-ray data structure
- wrap those data structures in a file system image suitable for a Blu-ray disc
- burn the file system image to a compatible disc
What does the data structure for a Blu-ray disc look like?
A Blu-ray disc must be burned with a UDF 2.50 filesystem on a compatible disc.
On that filesystem, you must have two folders called “CERTIFICATE” and “BDMV”. For our purposes, the CERTIFICATE folder can be empty. The BDMV folder contains our data tracks, plus metadata, in a particular arrangement of subfolders. For the purposes of this guide, it’s not necessary to know how the data is arranged within those subfolders.
A clarification on terminology
Please indulge me for a moment on a brief tangent. If you’re a post-production professional, you should already know this stuff.
In the digital world, there is a difference between media containers, and media streams (or “tracks”).
A media container (such as a file ending in .MOV, .MP4, .MKV, or .AVI) is a file containing one or more media streams.
A media stream is the raw data produced by a given encoder program.
Media is typically distributed in a container with multiple streams. But a stream can also exist in its own file.
For example: a .MOV container file might contain a video stream produced by a H.264 encoder, and also an audio stream produced by an AAC encoder.
Another example: another .MOV container file might contain a video stream produced by a Cineform encoder, a second video stream produced by a Prores encoder, an audio stream produced by a PCM encoder, and a subtitle stream produced by a SRT encoder.
The first example is something you might get out of a cell phone camera; one audio stream and one video stream. The second example is a possibly impractical application of putting many streams of different or similar types into one container file.
.MOV is just one container that happens to be widely used, because it can contain a very wide variety of stream types. Some other containers, such as .MP4, are particular about the types of streams they can contain.
Note that the file name extension is just an easy indicator of the container used. You can change the name of a .MOV file to end in .MP4, and most media players will figure out the discrepancy and still play it, but it is no less still a .MOV file. You can check the true container of a file with MediaInfo or ffprobe.
There are pieces of software that specifically create streams (“encoders”), and other software that specifically create containers (“muxers”).
Commonly, these two functions are combined, which is where the marketing can get fuzzy (Adobe Media Encoder, a common tool in the professional video industry, is both an encoder and a muxer). But for the purposes of this guide, the two processes are distinct, and occur in different steps.
Crucially, we will be producing streams that our Blu-ray compilation program (BD Wizard) will mux for us into containers.
Things you will need
- Compatible BD-R discs.
- 25GB and 50GB discs are suitable for HD Blu-ray.
- 50GB, 66GB, and 100GB discs are suitable for UHD Blu-ray.
- A Blu-ray disc writer.
- I’ve been happy with my LG WH16NS40, which can read/write up to 128GB Blu-ray discs. OWC sells this drive pre-installed in a high-quality USB enclosure.
- DVDLogic BD Wizard on a Windows PC.
- The yearly subscription is relatively affordable. The developer also offers a 30-day free trial.
- ImgBurn on the Windows PC.
- (if you want your Blu-ray to have a subtitle track) easySUP.
- On a Linux or macOS (virtual) machine: Command line binaries of ffmpeg, (if targeting HD Blu-ray) x264, and (if targeting UHD Blu-ray) x265, in your system’s PATH.
- I was unable to find binaries for Windows that worked for these tasks (the builds I did find online or that I compiled myself tended to stall at around frame 400 of the transcoding job, for reasons I never identified). I found that Ubuntu’s package repos had versions that worked, as did Homebrew on Mac. If you don’t already have a Mac or Ubuntu Linux machine, I recommend loading the latest version of the Ubuntu live image onto a USB drive, booting your PC off it, and running ffmpeg, x264, and x265 with that. WSL2 or other VM solutions such as VirtualBox that run on Windows also work, but I found on my PC that using a VM levied a performance penalty of around 85% when running x265 compared to running on bare metal. Your experience may vary.
- To install ffmpeg, x264, and x265 on a Mac with Homebrew installed, run this command:
brew install ffmpeg x264 x265 - To install ffmpeg, x264, and x265 on Ubuntu Linux, run this command and follow the prompts:
sudo apt install ffmpeg x264 x265
Preparing your input video and audio tracks
Export your film to the following formats:
- (if targeting HD Blu-ray) Your film’s video in any format that ffmpeg can decode (I recommend Cineform in a .MOV container, but most common file types should work) at 1920x1080. The frame format should be progressive. Blu-ray supports most common frame rates.
- (if targeting UHD Blu-ray) Your film’s video in any format that ffmpeg can decode (I recommend Cineform in a .MOV container, but most common file types should work) at 3840x2160. The frame format should be progressive. Blu-ray supports most common frame rates.
- Your film’s audio, in a stereo PCM .wav file, at 16 bit / 48KHz.
- If applicable, individual subtitle tracks in SRT format.
- If you need to convert from another format to SRT, I recommend Subtitle Edit. How to use Subtitle Edit is outside the scope of this guide.
Encoding the video stream
Transcode the video file into a Blu-ray compatible stream on your Linux or macOS computer:
-
(if targeting HD Blu-ray):
-
Run this command in a terminal, substituting
Source.movandOutput.264with your input and output videos, respectively:ffmpeg -i Source.mov -r 24000/1001 -pix_fmt yuv420p -f rawvideo - | x264 --bitrate 30000 --tune film --bluray-compat --vbv-maxrate 40000 --vbv-bufsize 30000 --level 4.1 --keyint 24 --open-gop --slices 4 --colorprim "bt709" --transfer "bt709" --colormatrix "bt709" --sar 1:1 --b-pyramid none --preset medium -r 24000/1001 --pass 1 -o Output.264 -- Options you can tweak here:
--fps,-r, andkeyint: This is the frame rate of your video.24000/1001is appropriate if your frame rate is 23.976. Keep these options in sync.--bitrate: This is your output video’s bitrate in kilobits per second. You might want to decrease this if your video is especially long, and the resulting video is too large to fit on your disc type. Otherwise30000is fine.
-
You should now see
Output.264in your output directory. Check it with a media player (I recommend mpv for this task) to make sure it looks right. You should expect to see your video playing at the correct speed without any distortion. I recommend playing through at least a full minute of video to ensure there are no intermittent encoding errors. -
Then run the command again! Replace
--pass 1with--pass 2. We’re doing two-pass encoding, which results in higher quality.-
It’s normal for the second encoding pass to be slower than the first.
-
Tip: you can run both passes sequentially by putting an && separator in between the commands for the passes. Like this:
ffmpeg -i Source.mov -r 24000/1001 -pix_fmt yuv420p -f rawvideo - | x264 --bitrate 30000 --tune film --bluray-compat --vbv-maxrate 40000 --vbv-bufsize 30000 --level 4.1 --keyint 24 --open-gop --slices 4 --colorprim "bt709" --transfer "bt709" --colormatrix "bt709" --sar 1:1 --b-pyramid none --preset medium -r 24000/1001 --pass 1 -o Output.264 - && ffmpeg -i Source.mov -r 24000/1001 -pix_fmt yuv420p -f rawvideo - | x264 --bitrate 30000 --tune film --bluray-compat --vbv-maxrate 40000 --vbv-bufsize 30000 --level 4.1 --keyint 24 --open-gop --slices 4 --colorprim "bt709" --transfer "bt709" --colormatrix "bt709" --sar 1:1 --b-pyramid none --preset medium -r 24000/1001 --pass 2 -o Output.264 -
-
-
-
(if targeting UHD Blu-ray) Run this command, substituting
Source.movandOutput.265with your input and output videos, respectively.ffmpeg -i Source.mov -r 24000/1001 -pix_fmt yuv420p -f rawvideo - | x265 --input - --input-res 3840x2160 --no-info --uhd-bd --repeat-headers --profile main444-10 --no-open-gop --no-b-pyramid --keyint 24 --min-keyint 1 --fps 24000/1001 --bitrate 50000 --vbv-maxrate 75000 --vbv-bufsize 75000 --colorprim "bt709" --transfer "bt709" --colormatrix "bt709" --output Output.265- Options you can tweak here:
--fps,-r, andkeyint: This is the frame rate of your video.24000/1001is appropriate if your frame rate is 23.976. If 24, replace these values with24. Change these three values together.--bitrate: This is the target bitrate in kilobits per second. We’re using VBR encoding, so this is merely a target for the average bitrate of the file. This should be as high as possible without (a) getting too close to the maximum read rate of 92Mbps for 50GB discs, or 144Mbps for higher capacity disks, or (b) making a file larger than the capacity of your disc. If you get “buffer underflow” errors from BD Wizard when compiling the disc’s files, your bitrate or peak bitrate (described below) are probably too high. I found that50000(50 Mbps) is already practically indistinguishable from lossless for SDR content, so no need to push it to the max.--vbv-maxrate: The peak allowable bitrate for the file. Again, should not get too close to the maximum read rate for the disc. The theoretical maximum minus 20% should be fine in my experience. I used75000(75Mbps) on Chicken Surprise, which worked well.--vbv-bufsize: According to the BD Wizard developer, this should ideally be 140% of the target bitrate, but no larger than the peak bitrate.
- You can expect this to take 15-30 minutes for processing per minute of video depending on the speed of your computer, and it will monopolize your computer’s CPU resources in the meantime, so plan accordingly.
- After processing is complete, you should see
Output.265in your output directory. Check it with a media player (I recommend mpv for this task) to make sure it looks right. You should expect to see your video playing at the correct speed without any distortion. I recommend playing through at least a full minute of video to ensure there are no intermittent encoding errors.
- Options you can tweak here:
Encoding the subtitle track (if your movie has subtitles)
Convert your subtitle track into the Blu-ray SUP format with easySUP.
- Open easySUP. Click the “Subtitle file” field, and select the .SRT file containing your subtitle track.
- In the right side of the window, choose the following options:
- Format:
BD SUP - Resolution:
1080(regardless of whether your target is HD or UHD Blu-ray) - Mode:
Fast - Frame rate: As appropriate for sync to your video track.
- Font settings as you prefer.
- Format:
- Click “Start,” and choose a destination for your .SUP file.
Compiling the Blu-ray media data structure
Compile the Blu-ray disc using BD Wizard:
-
Open BD Wizard, and add your video, audio, and subtitle tracks to the list on the right side of the window.
-
On the left side of the window, choose a method for BD Wizard to create chapters (“scenes”) for your Blu-ray.
- “Scenes number” will evenly distribute the specified number of chapters throughout the video.
- “Scenes interval” will automatically place a chapter for every x minutes of video.
- “Scenes list” will let you choose timestamps at which to place chapters. You can use the “Scene editor” button to open a GUI for choosing timestamps.
-
Again, this guide doesn’t cover how to add more than one video title, or how to add menus, bonus features, etc. So I’m skipping the pages for those features. Click next until it asks you to save your BD Wizard project file. I recommend saving to a folder with nothing else in it, because the next steps will create a bunch of files and subfolders next to the project file.
-
You will be prompted to choose a “Project name,” “Project info,” and “Blu-ray type.” You can fill anything you want into the first two fields; they will be shown when a user inserts the disc into certain players. Select Blu-ray type as follows:
-
(if targeting HD Blu-ray) choose “BD or 3D BD (v200)”.
-
(if targeting UHD Blu-ray) choose “UHD BD (v300)” and an option from the dropdown:
-
If you’ll be burning to 50GB discs, choose “50GB Default TR, 91.916 Mbit”
-
If you’ll be burning to 66GB discs, choose “66GB High TR, 143.86 Mbit”
-
If you’ll be burning to 100GB discs, choose “100GB High TR, 143.86 Mbit”
-
(If after burning your discs, your player(s) are having issues reading them, you can try turning down the TR here. This is more likely to happen if you’re using cheap no-name discs, I guess.)
-
For UHD Blu-ray, each capacity of disc has different compatible data rates, which you’ll need to chose from while creating the discs' file system:
The specification for 4K Blu-ray allows for three disc capacities, each with its own data rate: 50 GB at 72 or 92 Mbit/s, and 66 GB and 100 GB at 92, 123, or 144 Mbit/s.
- wikipedia: https://en.wikipedia.org/wiki/Ultra_HD_Blu-ray
-
-
-
Click OK. BD Wizard will compile a folder called
MUXED_{Project name}in the destination folder you previously chose.- Before burning this to a disc, I recommend checking with VLC Media Player that this folder is playable. In VLC, choose “Media > Open Disc…”, select “Blu-ray”, and then choose the
MUXED_{Project name}folder that BD Wizard generated. Test all video, audio, and subtitle tracks. If all looks well, then congrats! All that’s left is to burn to disc.
- Before burning this to a disc, I recommend checking with VLC Media Player that this folder is playable. In VLC, choose “Media > Open Disc…”, select “Blu-ray”, and then choose the
Burn your disc(s)
Use ImgBurn to burn your disc(s):
- Insert your blank disc into your writer drive.
- Open ImgBurn. Choose “Write files/folders to disc.”
- Inside the
MUXED_{Project name}folder that BD Wizard generated, you’ll find two subfolders. Add each of these subfolders to the “Source” pane in ImgBurn using the button that looks like a magnifying glass over a folder. - Below Source, choose the Destination drive containing your blank disc.
- In the right side of the window, switch to the “Options” tab.
- Leave “Data Type” set to “MODE1/2048.”
- Under “File System,” choose “UDF.”
- Under “UDF Revision,” choose “2.50.”
- Again on the right side of the window, switch to the “Labels” tab.
- Enter a label for the disc in the “UDF:” field. The bar at the bottom of the window will turn red if the label is too long.
- Move to the “Device” tab.
- Change “Write Speed” to the maximum speed supported by your disc. You can usually see the maximum speed printed on the disc itself, and/or the packaging the disc came in. ImgBurn should in theory choose the correct speed by default as reported by the disc, but this was not the case for me, which led to a disc being wasted.
- Click the “Build” button (looks like a file folder, a blue arrow, and a disc being etched by a laser).
- ImgBurn will ask you to confirm info about your disc. Click “OK.”
- Let ImgBurn write and then verify your disc. When it’s done, it will play a jingle.
- At this point, you may put another blank disc into the drive and burn more discs.
- You may be tempted (as I was) to create a .iso disc image that you could use to burn more discs in the future without using ImgBurn. While this is a good idea, the resulting discs don’t work. You will need to use ImgBurn every time you write a disc.
At this point, check the quality of your discs thoroughly using a Blu-ray disc player. All video, audio, and subtitle tracks should be accounted for.
Making the discs look nice
I found that Avery 8944 CD labels could be printed with pretty good image quality on a basic color inkjet printer. Some test prints were required to dial in the colour settings in the printer’s driver. Discs with a white surface worked best with these labels.
Does it matter if I cheap out on discs?
It’s hard to say. If you’re shopping online, stick to well-reviewed products and sellers. It’s normal if you’re buying cheap discs from no-name brands to get a few duds in a stack, but maybe saving a couple of bucks per disc is worth it. What I’d be more worried about in the long-term is data integrity on cheaper discs. If long-term storage is your plan for your discs, you may want to opt to get “M-DISC” certified discs, which are lab tested to retain data after exposure to extreme conditions, which are supposed to simulate approximately 1000 years in good storage conditions.
Glossary (non-exhaustive):
- HD Blu-ray: A specification and consumer distribution format for (for the purposes of this guide) Full HD (1920x1080p) movies.
- UHD Blu-ray: A specification and consumer distribution format for movies in the raster resolution of 3840x2160p (aka Ultra HD, or UHD).
- BD Wizard: A Windows application for compiling video tracks, audio tracks, subtitle tracks, and interactive graphics into the file structure required by the Blu-ray specifications.
- ImgBurn: A Windows application for writing the Blu-ray data structure onto a disc in the correct format for playback on a Blu-ray compatible player.
- ffmpeg: A cross-platform programming library (available as a standalone application) for converting to and from many different audio and video formats. In this guide, we use it exclusively for converting a Cineform video stream into a raw video stream, and passing that raw stream to x264 or x265. It can only be used via command-line consoles (e.g. Command Prompt on Windows computers, or Terminal on Mac computers).
- x264: A cross-platform programming library and standalone application for encoding a video stream into the H.264 (aka AVC) format, including the specific variation of that format used for Blu-ray video discs. It can only be used via command-line consoles (e.g. Command Prompt on Windows computers, or Terminal on Mac computers).
- x265: A cross-platform programming library and standalone application for encoding a video stream into the H.265 (aka HEVC) format, including the specific variation of that format used for UHD Blu-ray video discs. It can only be used via command-line consoles (e.g. Command Prompt on Windows computers, or Terminal on Mac computers).
- easySUP: A cross-platform application for converting common subtitle formats to each other.
- .SRT file: A common file format for subtitles and closed captions. Not directly compatible with Blu-ray players.
- BD-R disc: A one-time writable disc format available in a multitude of capacities, which can be used to store either data or multimedia video for playback with a Blu-ray player.
- VLC Media Player: A cross-platform media player application that is capable of playing a multitude of formats, including unencrypted Blu-ray discs.
- Blu-ray SUP: A sparsely-documented format for subtitles, used by the Blu-ray video specification.
- VPS: Virtual Private Server. A virtual machine that you rent from a cloud provider such as Azure, Hetzner, or Linode.
- Ubuntu Linux: A free and open-source operating system based on the widely-used Linux kernel and standard GNU tools.
- Homebrew: A package manager for macOS, which streamlines the installation, updating, and removal of software available through the Homebrew software repositories.
- UTM: An open-source program for creating virtual machines on macOS systems.
- Virtual machine: A computer defined in software, running on another computer.
- System PATH: The set of directories where your computer looks for programs accessible from a command line text terminal.
Useful links:
- The UHD Blu-ray whitepaper
- The user guide for Blu-disc Studio. Blu-disc Studio is the sister product to BD Wizard, which is easier to use and more powerful, but with a much higher price tag. Despite the programs being dissimilar in scope and use, there are some useful tidbits in the manual about file formats.
- UHD Blu-ray on Wikipedia. This page contains useful information about disc types and data rates.

Great recent talk from Cory Doctorow on de-shittifying the internet: youtu.be/rimtaSgGz…
Notes on reverb and dialogue mixing for film
Wow, realistic reverb plugins for film are expensive.
I’m currently doing the dialogue mix for Chicken Surprise, and am finding that Resolve’s built-in Reverb plugin isn’t great for matching dialogue recorded in different places (i.e. ADR). A quick Google search reveals that the best way to solve this problem is to record an “Impulse Response” (IR) with each mic setup at the location, and use a “convolution” reverb plugin with those IRs to match the exact acoustic properties of each room in post. There are ostensibly quite a few good, free convolution reverb plugins out there. Unfortunately, I didn’t know about this technique two years ago when we shot Chicken Surprise, or else this would have been a great time and money saver.
There are plugins out there that come with lots of IRs pre-loaded, like those from Acoustic Ease. These seem to be the industry standard in reverb for post-production. Indoor looks particularly cool; it has a Sims-like isometric 3D GUI for controlling the distance and relative positions of your sound source and pickup in various real-world locations. Unfortunately, Audio Ease’s plugins are in the high hundreds of dollars each.
As previously mentioned, there are also free CR plugins, which can be combined with IRs downloaded from the internet. This potential solution merits further research.
Convolution reverb plugins stand in contrast against so-called “algorithmic” reverb plugins, i.e. those that have a bunch of knobs that control things like “room size” and “decay,” to let you design a sound that might not exist in any real-world space. Resolve’s built-in Reverb plugin is this type. Neoverb is another, which seems like a better fit for music than film due to its exaggerative properties.
Eventually I settled on Valhalla Room, which is a popular, realistic-sounding reverb that I’m finding works well for the ADR in Chicken Surprise. The kicker is that all of Valhalla’s plugins are $50 USD, which is actually pretty cheap. In other words, an order of magnitude cheaper than the industry-standards. It sounds great with very little tweaking, which I credit mainly to presets that are named sanely.
(Aside: why do so many audio plugins name their built-in presets things like “bottom of a goblin’s drinking well if it was made of a pringles can” or “scroingo boingo like to party!!” instead of anything that makes sense??)
Another audio revelation this evening: Resolve’s Dialogue Processor is great for fixing off-axis or mumbly recordings in few clicks.
“I want to linger in this space as long as possible, this space of smooth and efficient movement through the world, gliding in near total mechanical silence, just the sound of rubber on the pavement, wind in my ears, breaking waves, salt, the smell of pine. This is what electric bikes do: They drive you insane with the poetry of the world."
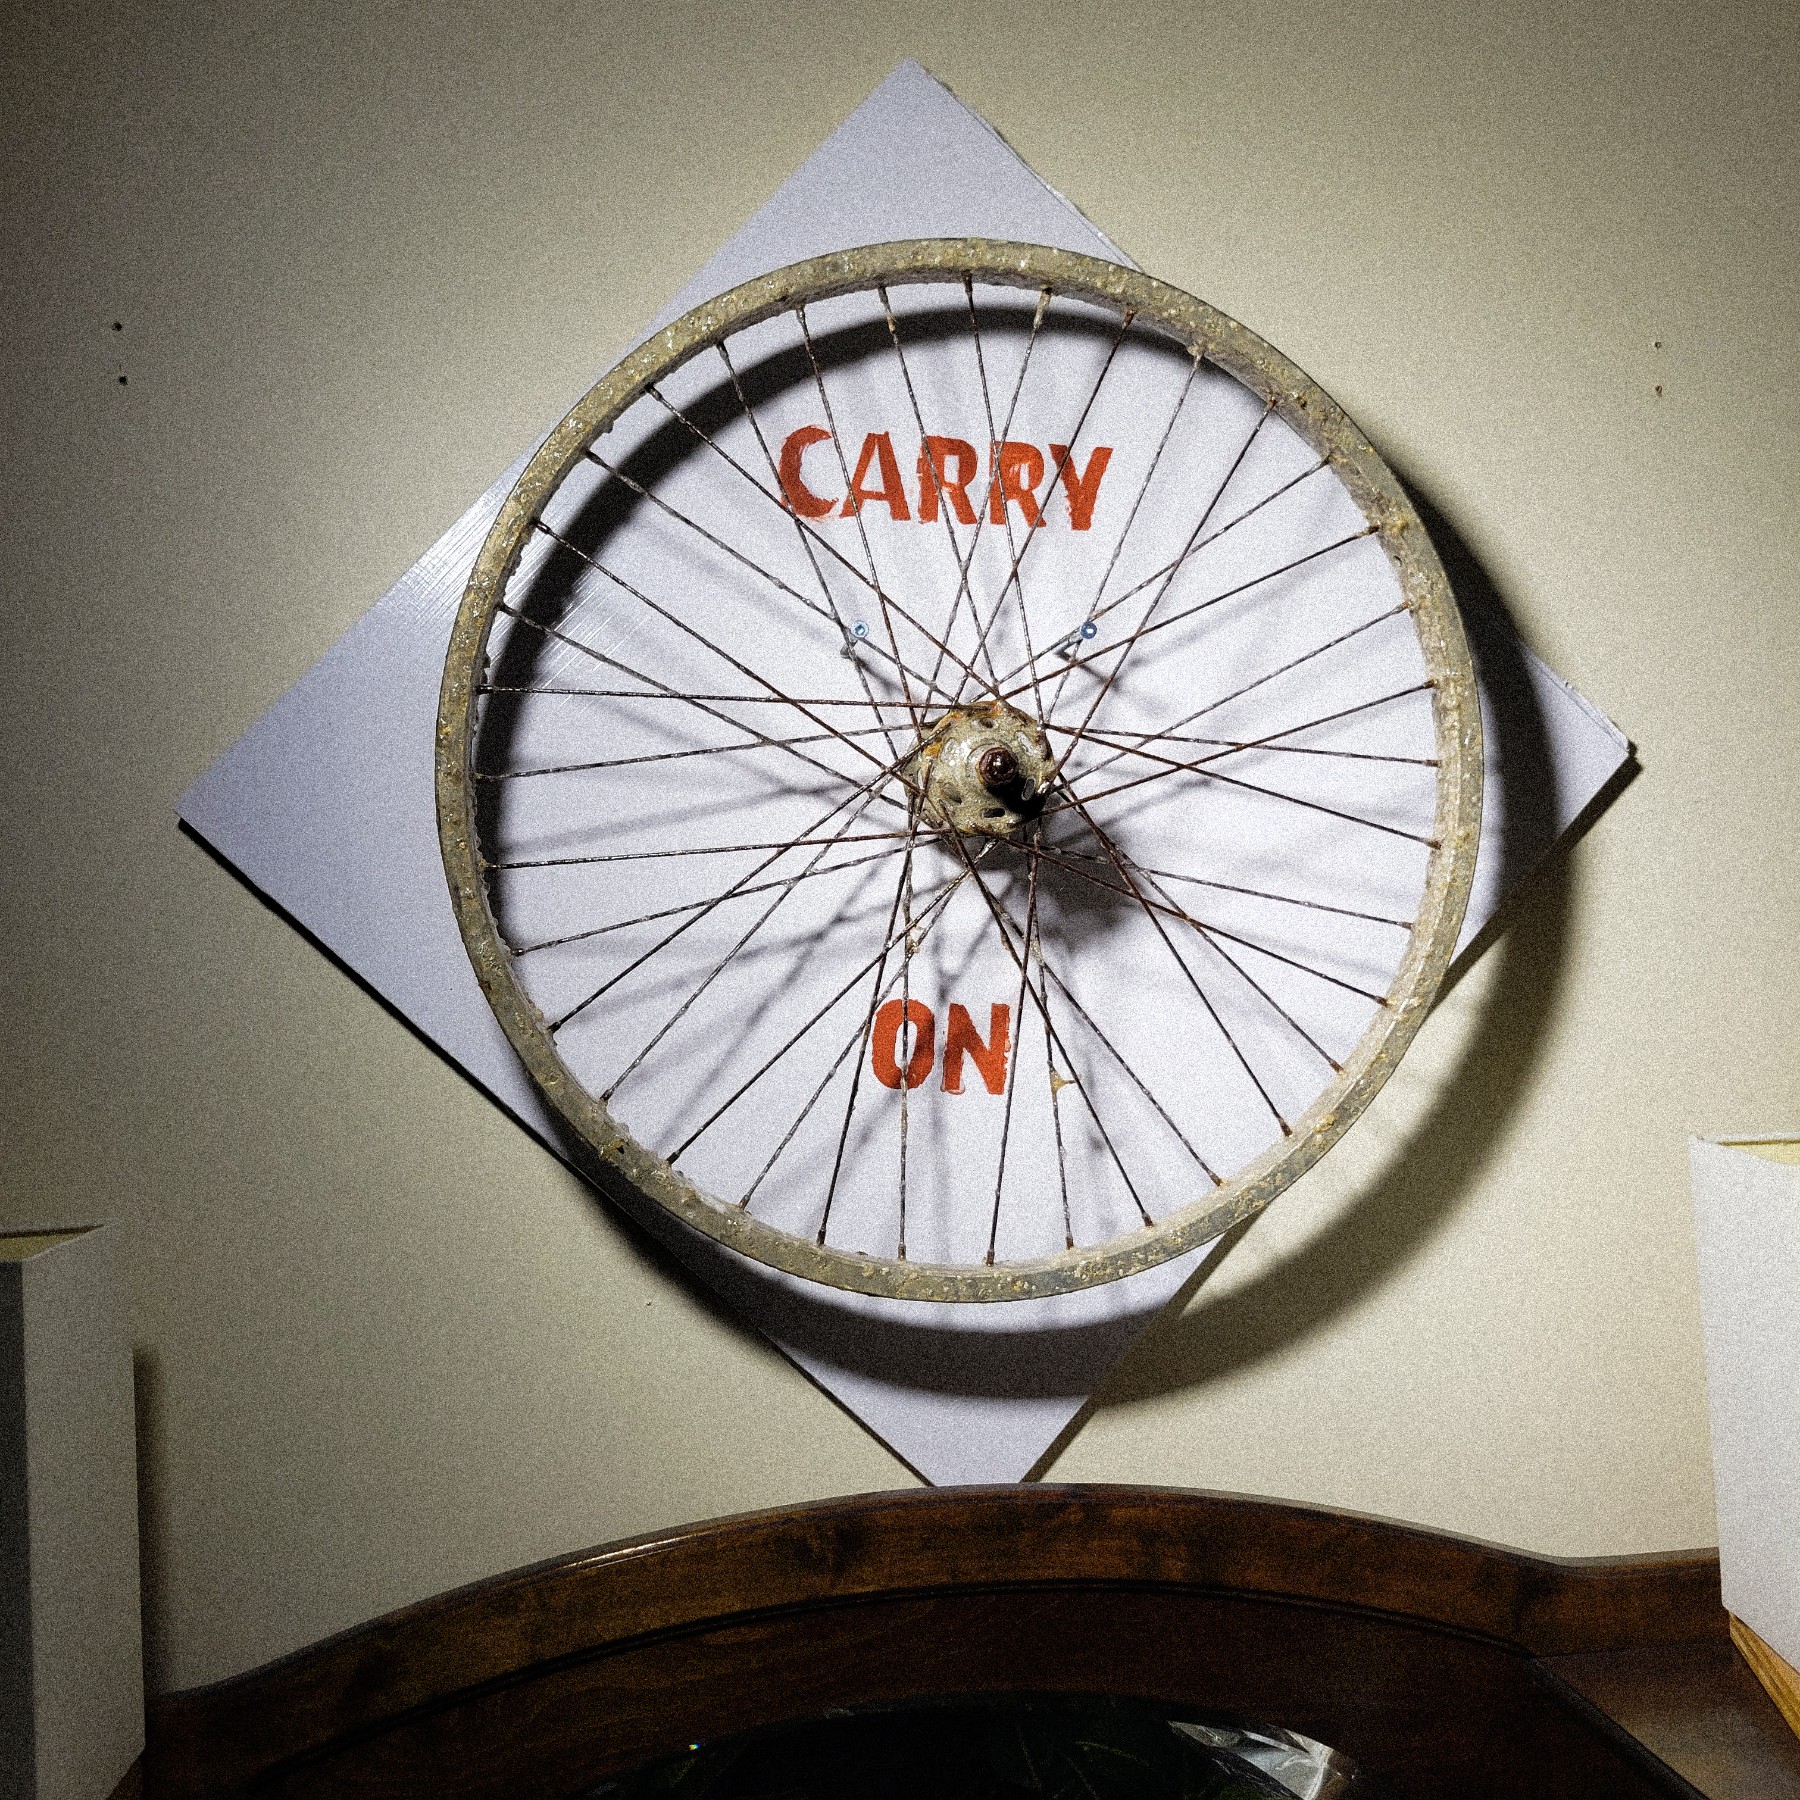

Always either reaping the rewards of plans set in motion by Past Me (he is a genius) or trying to simplify things for Future Me (he is an utter buffoon) meanwhile I, at the centre of time, am forever burdened to decipher the horrid whims of both
Distribution of photos taken while traveling in March 2022, by focal length. (Extracted from Exif data. Using 24-105mm lens, full frame equiv.)

Creating APFS snapshots for non-boot volumes in macOS with Carbon Copy Cloner
Like other modern filesystems, APFS supports volume snapshots with robust copy-on-write. After you create a snapshot, any data written to the volume is in addition to the contents of the snapshot. So a snapshot only “uses” as much disk space as the delta between the snapshotted state and the current state. Rolling back to the snapshotted state is quick, and doesn’t require any partitions or duplicating of data.
Unlike other modern filesystems, APFS doesn’t provide admin-friendly tools for creating snapshots. The closest we have is tmutil, which only works on the current boot drive.
Fortunately, Carbon Copy Cloner fully implements creating, managing, and restoring APFS snapshots on any volume connected to the system.
At work, I’m currently testing MDM Automated Device Enrollment for our fleet of Macs. Testing ADE repeatedly meant getting macOS to a clean state (pre-Setup Assistant) every time I wanted to test config changes on my test machine. Re-installing macOS took about an hour, which was not ideal. If I could create a snapshot of a clean installation of macOS, then revert to that snapshot, progress would be much faster.
As it turns out,tmutil can’t be run from Recovery (even if you load the binary into a Recovery terminal). And of course it can’t be run in macOS until after Setup Assistant. So officially-blessed solutions notforthcoming, I put my test machine into Target Disk Mode, connected it to my work computer via Thunderbolt, and then in Carbon Copy Cloner, selected the data volume, and triggered and then canceled a clone task to an external drive. This had the intended effect of creating a snapshot of the data volume on my test machine. When I was ready to revert to the snapshot, I just had to put the test machine into Target Disk Mode again, connect it to my work computer, and in CCC, select the snapshot. Reverting took about 10 seconds each of the several times I had to re-test my ADE config, saving me several hours in total.
The fact that Apple hasn’t provided a way for admins to create volume snapshots on just any APFS drive — though does provide a way to list or delete them via diskutil — betrays an opinion that volume snapshots are only useful for Apple engineers building tools like the OS updater and Time Machine. Actually, I think admins would use this feature if it was available to them, as it has been in Windows since 2003, and Linux since 2005.
Vakt: my new custom homelab microserver
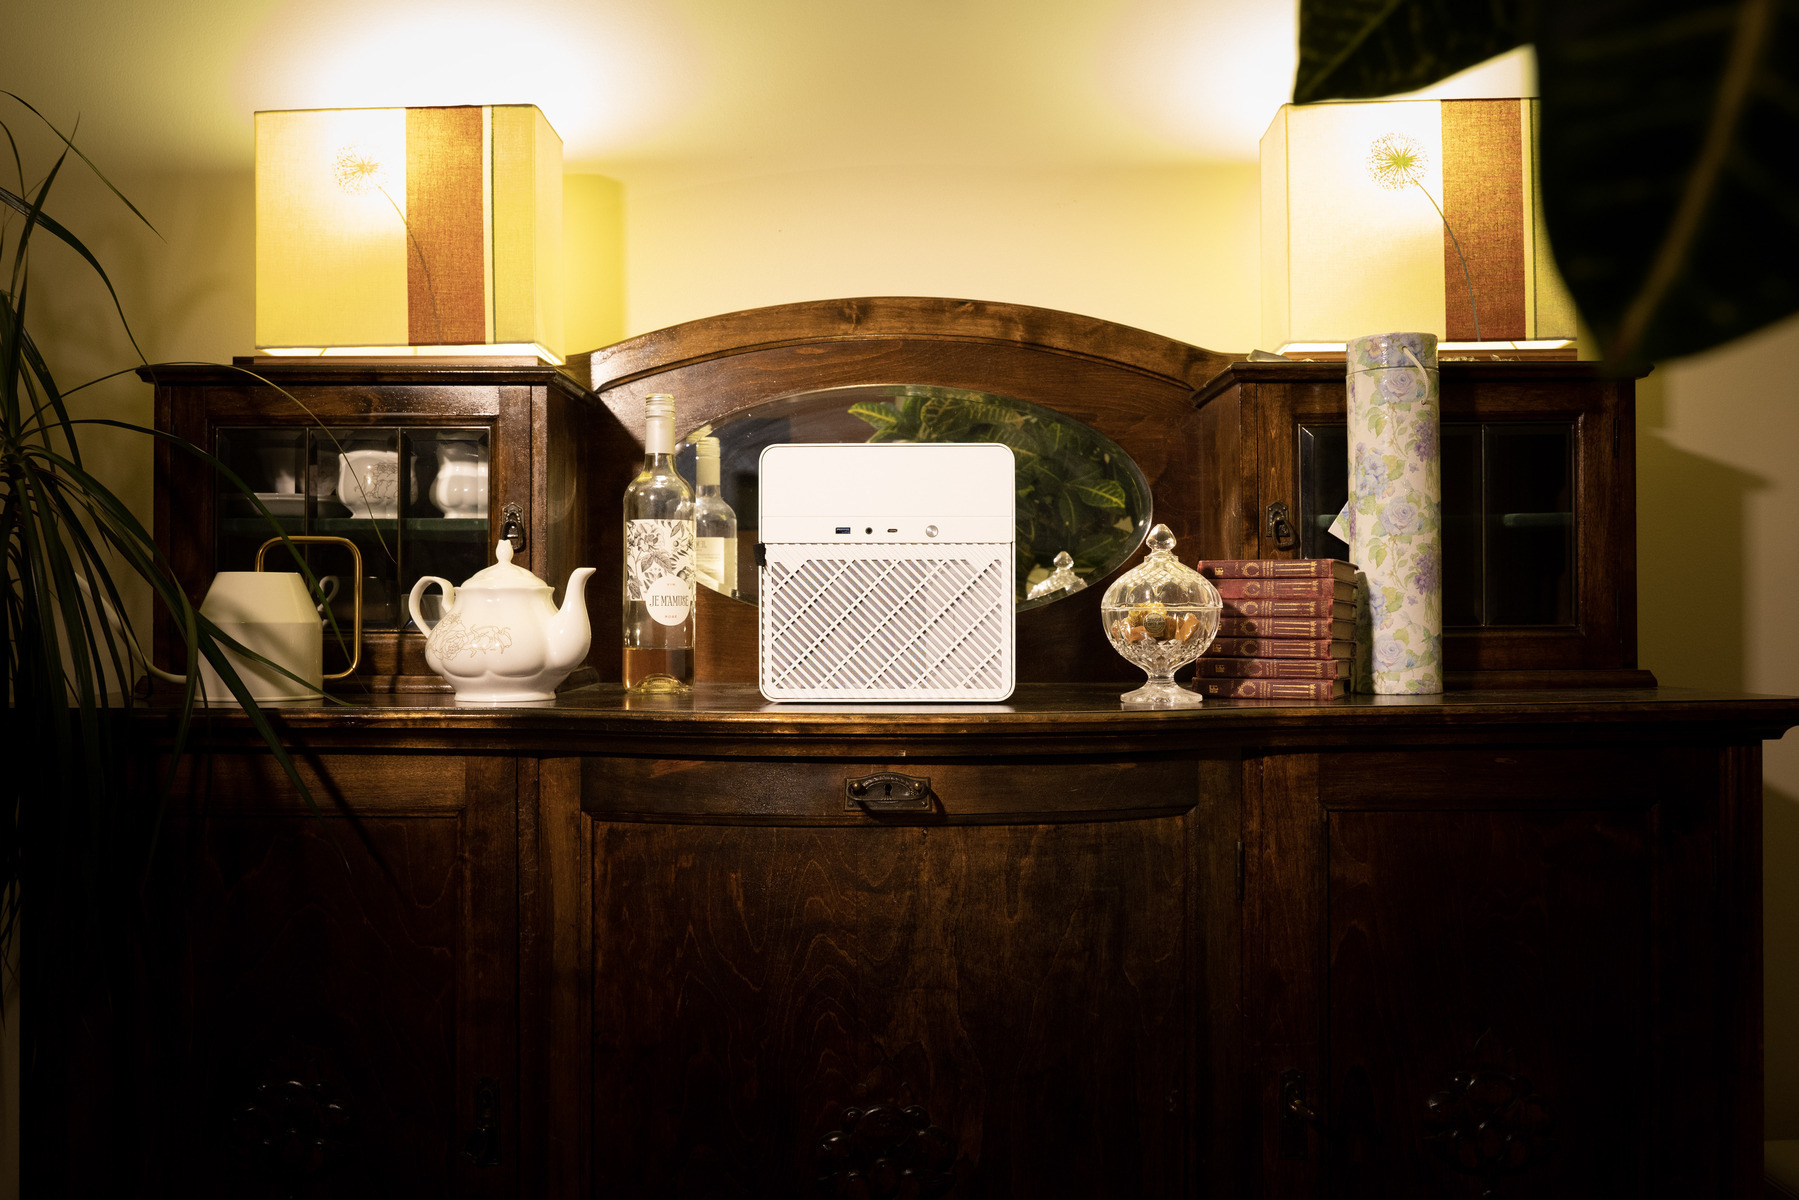
Goodbye, old HP DL380 Gen9 rackmount server that I got on eBay several years ago. Hello to my new custom microserver, Vakt.
Vakt: Swedish for sentinel, or guard. An homage to a popular Swedish furniture brand, with which Vakt shares aesthetic influences. Danish and Norwegian have an alternative definition: to awaken, literally or spiritually. (Source: vakt - Wiktionary)
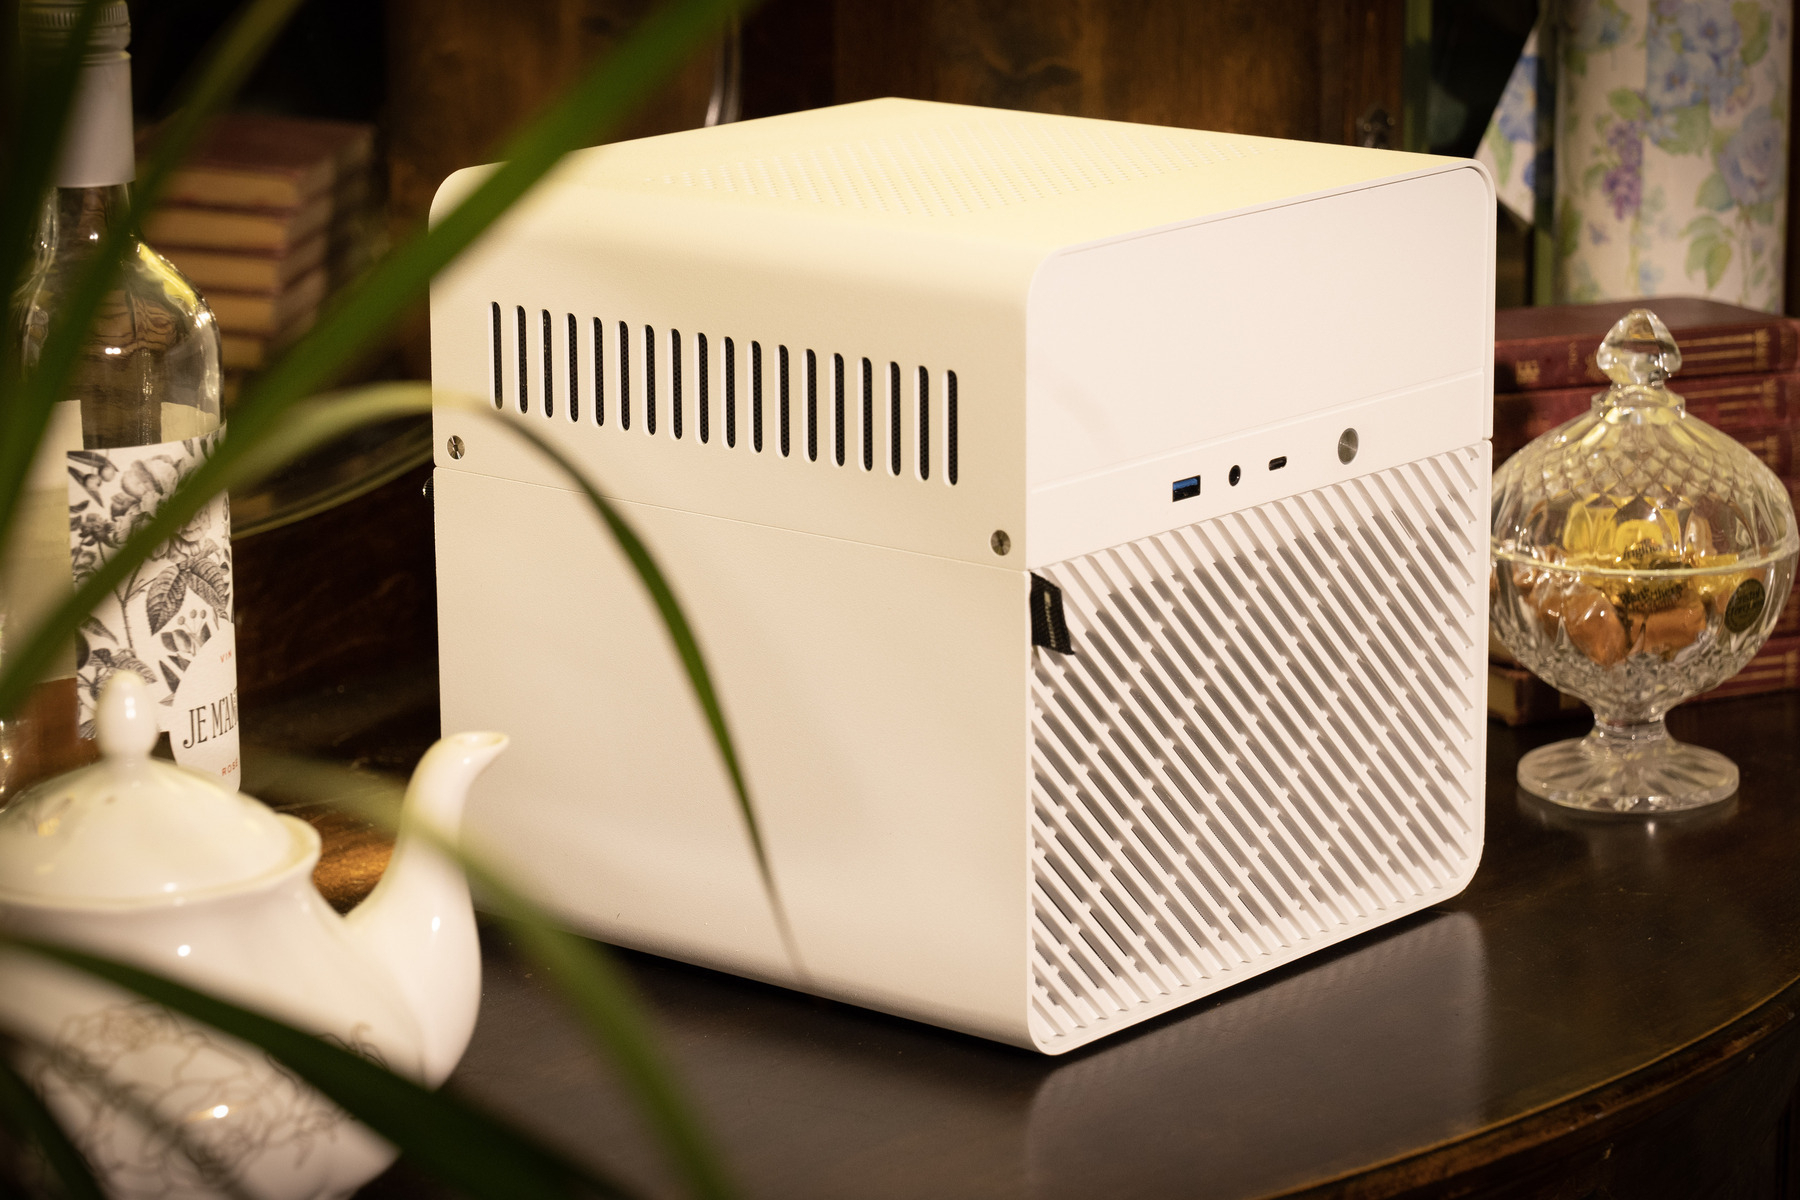
The design: Vakt is a cube, measuring 22cm across each side. The “N2” case — designed by Jonsbo, just outside Shenzhen, China — is the most impressive small NAS case I’ve come across. The design of the N2 allows the CPU cooler to draw fresh air directly through the top of the case. Another fan draws air from front to back, through a bank of hard drives. A third intake for the fanless power supply gives it ample room to breathe. This three-zone airflow design gives every component direct access to fresh air, while keeping Vakt whisper-quiet. Its portability and low power consumption make it perfect for ephemeral housing or off-grid lifestyles. And a majority of components inside have been repurposed from aging high-end systems, extending their useful lifespans and keeping them out of landfills.
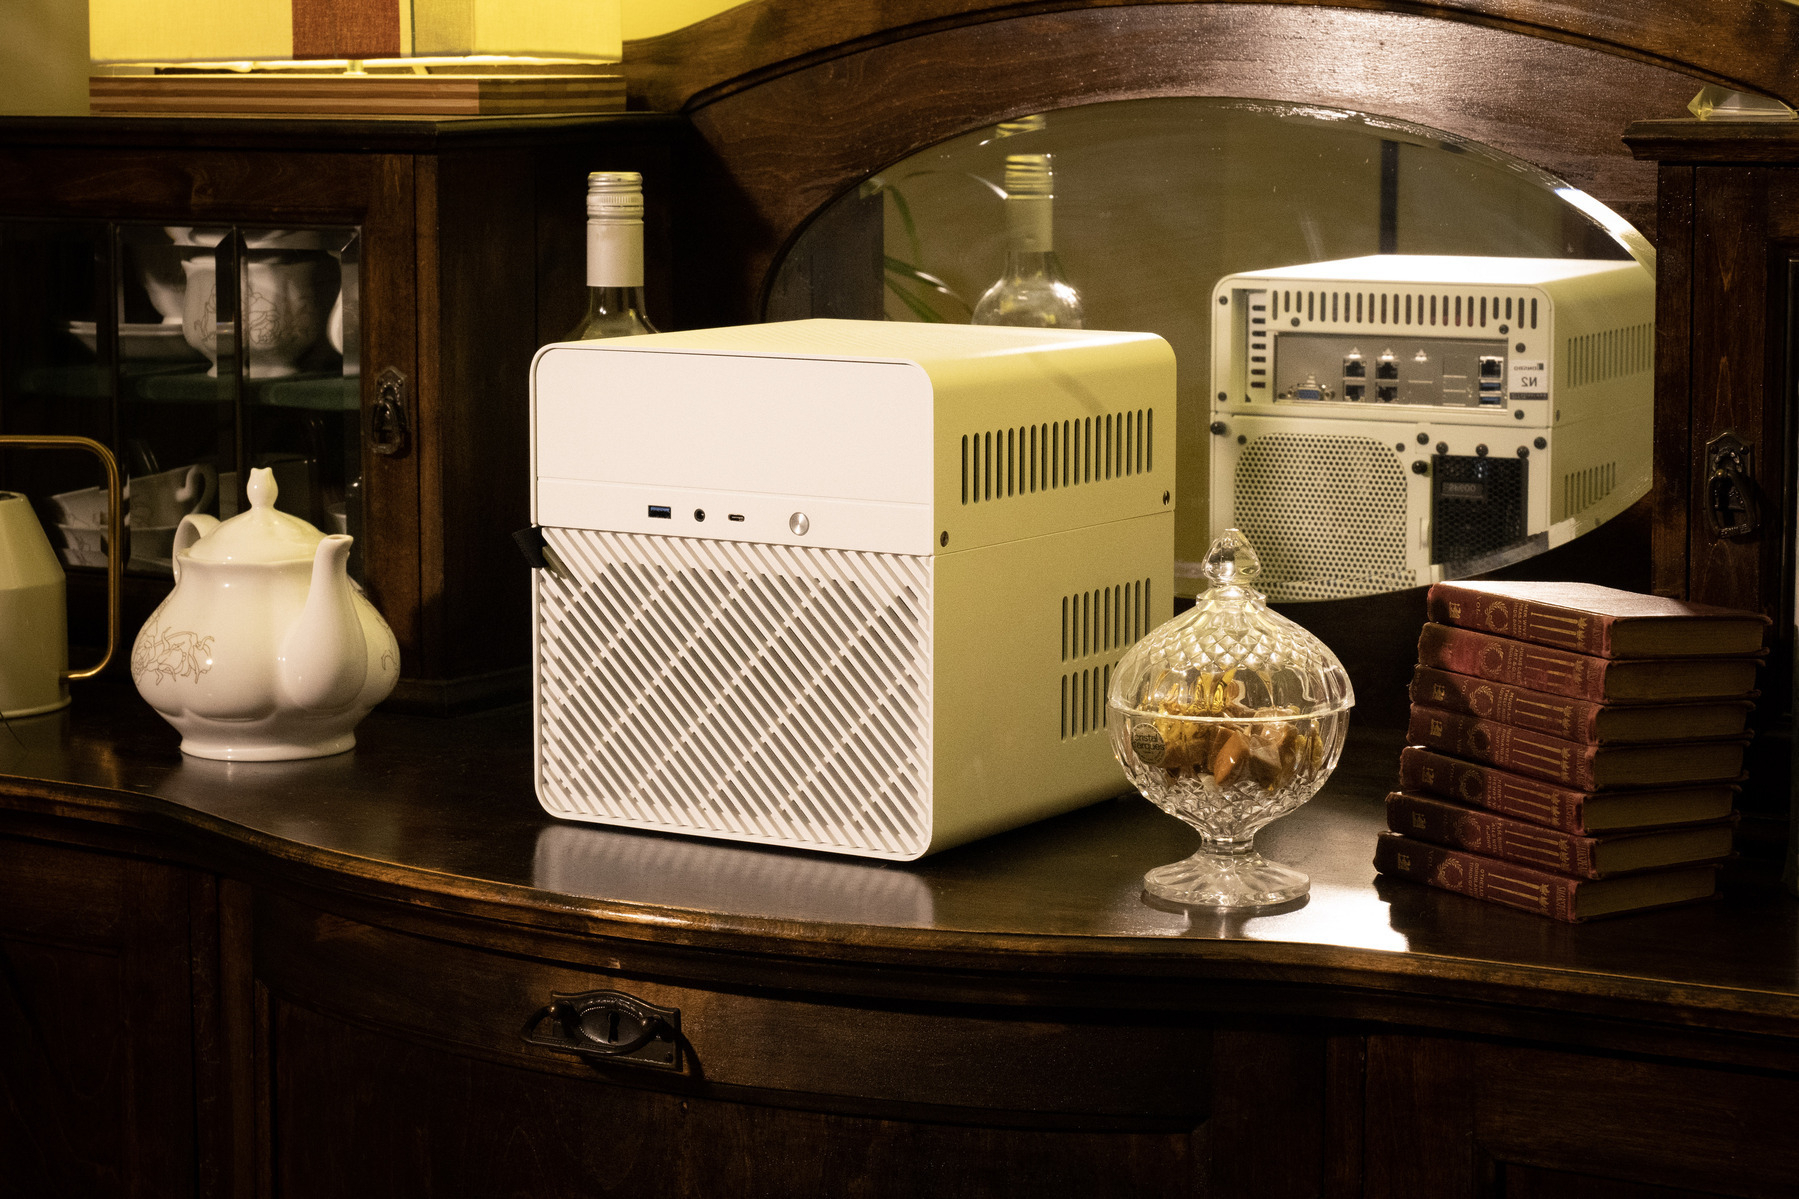
The computer: A Supermicro X10SDV-F system-on-board forms the heart of Vakt. The board is equipped with a low-power Xeon D-1541 eight-core processor, 128GB of RAM, and dual ten-gigabit Ethernet. Five 3.5-inch hot-swappable hard drive bays contain 8TB of redundant storage (expandable up to 110TB without redundancy). The CPU cooler has been modified with a Gelid Silent 5 fan and a PWM controller from the custom water cooling industry, which keep Vakt at a polite 23 dBA at idle. Vakt is the most respectful roommate I’ve ever had.
My fan controller script — which can easily be adapted for other SuperMicro X10 systems, is available for download here.
The software: Vakt is configured as a virtual machine hypervisor with Proxmox VE. Each virtual machine (or Linux container, which is like a virtual machine but with near-zero overhead) runs one or more services. As of writing, those include an OpenProject server for organizing my personal projects, network-attached storage including live sync with my desktop using Resilio, some game servers, and an experimental network of VMs that I use for labbing. Everything is software-defined, so production and testing environments can be run at the same time on Vakt, and be kept completely isolated for security.
Update, 2024-12-14: Some changes to the above: The CPU is now cooled with a SilverStone FTF 5010 fan instead of the former Gelid model and PWM controller, following two unit failures. The OEM case fan has also been replaced with a Noctua NF-A12x15. Resulting from those changes, the system now emits a less distracting noise profile. Storage capacity has also been improved to 16TB until I need more than that. I’ve ditched OpenProject and Resilio for now, and added Bitwarden, Caddy, and copyparty to my hosted environment. Frigate, too, supported by a Google Coral ML inferencing accelerator so that I can get eyes on the critters that come around the house at night. Vakt is still performing admirably at these new workloads.
Time Moves Sideways: Using mapped time displacement on timelapse video footage
On July 24th, 2022, I sacrificed a good night’s sleep to take 2,348 photos of the downtown Vancouver skyline as the sun rose behind it.
My camera peered out through the sunroof of my Mom’s Kia Soul toward downtown, and I set it to work, taking a photo every 6 seconds. I watched the new season of Stranger Things in the back of the car, on a blanket.
My goal was to capture the scene in a timelapse. I had done a few timelapses of this kind before, with less experience as a photographer. It was time to see if I’d improved.

^ The ✨gear✨ used for those who care: Panasonic S5, Canon 70-200mm L IS USM @ 150mm, f/7.1, AmazonBasics tripod (long-since discontinued), USB battery bank.
The shoot went well. But later, when I processed the photos, I noticed that there were a few issues with my approach.
The most obvious problem was that over time, as I shifted my weight in the back of the car, I inadvertently moved the camera. Oops.
The second problem was that my vantage point wasn’t entirely clear. Vancouver is designed in such a way that only the rich get nice views of the city, while the middle class are underhoused to make way for those nice views. I carefully positioned the car on the side of the road, so the camera could peer between two very expensive houses. The vantage point was so narrow, I caught the roof of one of those houses in my shot. It couldn’t be helped.
The third problem was some annoying exposure flickering, that was visible only in the last few-hundred frames. I can’t account for this, but I think it may have been due to glare from tree shadows moving in the wind.
After some colour correction and conversion from raw sensor data to YUV video files, I set my sights on correcting for camera movement. The point and planar trackers in Fusion didn’t seem to like my images; they shifted a few pixels in the +Y direction for every frame after the first few hundred. Before the trackers could even reach the end of the sequence, the tracking points drifted entirely off-screen. After scratching my head for a while, I gave up and switched to Mocha Pro’s planar tracker. Mocha had no problem accurately tracking my shot, which let me convincingly cancel out all camera movement with a simple X-Y transform and crop.
Once all camera movement was eliminated, painting out the house roof was as simple as using a paint node with the clone stroke tool. Exposure flickering was effectively taken care of with the Color Stabilizer effect in Resolve’s Edit page (which is inexplicably not available in Fusion, ugh). Then, any frames that contained passing obstructions (cars, birds, etc) were removed.
Next, I did a couple of passes for colour correction. I broke the timelapse up into several time segments marked by distinct lighting changes. I tweaked each of those segments independently with basic colour wheels and curves. Some segments with large changes in exposure got further application of the Color Stabilizer effect. Then the segments were faded together to produce smooth transitions.
This is as far as I had expected the project to go: a basic timelapse of a stunning landscape view. But I was underwhelmed with the result.
It’s fine, I guess! All of my post-processing fixes worked pretty well. But it lacked a certain wow factor that I’d expected to push me to post it to social media.
It was at this moment that I remembered this reel. In it, user @dylanzchen split their cityscape timelapse shot into several vertical slices, each of which was offset in time. The result was striking and original, and I considered stealing the idea. In the moment immediately following that thought, my brain served up a memory-stew containing this TikTok of some cats distorted by a “slit scan” effect, and the intro of this old Vsauce, which used a time displacement map to probably blow my 12-year-old self’s mind.
That led me down a rabbit hole, where I found a way to replicate that old Vsauce effect in Fusion, with an effect called “Time Mapper” included in this freeware plugin pack, developed by a person known to me only as Raf.
^ An early test of spacial time mapping in action.
The old Vsauce video used a time displacement of about 100 frames. If I used the same effect on all of my frames, I could effectively create a timelapse where time moves sideways across the landscape, with time displacement rolling as a function of a linear gradient, plus time itself.

This is the gradient I used, which was generated in Affinity Photo in 16-bit precision (we’ll soon explore why) with the linear gradient generator. I had to use Affinity Photo, because it turns out that the “linear” gradient generator in Photoshop isn’t linear at all!
Feed that gradient and my frames into the Time Mapper node, and tada! Nothing happens! 🎉
Turns out that if you try to cache two-thousand-three-hundred-and-forty-eight 5.3K frames in 16-bit precision into RAM, you need a lot of it. Like, way more than the 96GB I have in my personal machine, and still way more than either Amazon or Microsoft would give me if I wanted to run this workload in the cloud.
One easy way to optimize this workload is to shorten the sequence. Not much happens in the first couple-hundred frames, so I dropped two out of every three of those, to get to the action quicker. Similar story with the last few hundred frames — those are even less dramatic, so I cut them altogether.
Now I was left with around 1,500 frames, which were still too big to fit into memory on the biggest cloud machine Amazon would give me keys to. But I wasn’t done yet. I cropped into a 16:9 frame, which reduced file sizes by half. I had initially planned to do this as a final step before posting to social media anyway.
If you’re following along with the math at home, you may have already noticed another potential optimization: reducing the colour depth of the images from 16-bit to 8-bit, thereby cutting data in half again. But the trouble was that I needed 16-bits (or at least 11-bits) of precision in the gradient image, so that the number of frames in the timelapse didn’t exceed the number of colour steps in the gradient, and so the time mapping animation could move smoothly. As far as I know, Fusion processes a node using the same colour depth as the input, so reducing the bit depth of the timelapse would be effectively the same as reducing the depth of the gradient image. So that was not an option.
Anyway, even with 16-bit colour depth, rendering this on a cloud-hosted machine was finally within the realm of possibility.
At this point in the story, I’m going to gloss over the numerous trials I went through to get Fusion running in the cloud. You see, Fusion needs an OpenGL-accelerated desktop to render the viewport. It will happily render frames on the CPU! But the GUI will not open without OpenGL!
Amazon eventually granted me access to a VM with 224GB RAM and two Nvidia Tesla M60 GPUs; less than I’d asked for, but enough after optimizing the workload. I got Fusion’s GUI to run with TightVNC, and the steps in this video by Craft Computing on YouTube, plus the info in this StackOverflow answer on the location of the nvidia-smi utility, which differed in my case from the video tutorial. Once Fusion was running in a hardware-accelerated desktop, I could switch from VNC to RDP for a nice latency reduction.
It occurs to me as of writing that I could have probably used the command line and saved myself some trouble… oh well.
At this point I also need to give a huge shout out to Raf, the developer of the Krokodove toolset that contains the Time Mapper tool I used, who graciously upped the frame limit from 1,000 to 2,000 at my request! I would have had to significantly scale back my ambition without this change.
Add a blur node for the border where the timelapse restarts, render for an hour, et voilà! I present the culmination of this project!
^ (duration shortened for this post)
The final render ended up being about 50 seconds long (at 30 frames per second). With some frame blending, we can slow it down even further, which looks pretty good as a screensaver.
As far as screensavers go, anyway. I’m not sure what I’ll do with the result. I don’t actually like screensavers.
Key takeaways:
- Don’t shoot a timelapse from inside a car which also has moving things (i.e. me) in it.
- Check framing before shooting. This is obvious in hindsight — I paid more attention to the obstacles I was shooting around than the frame itself. If I had done some test shots, I would have noticed that my composition wasn’t ideal, and probably would have tried to capture more of the landscape to the east (which would have included the sun itself).
- Don’t shoot under tree shadows. It couldn’t have been avoided in this case, but I could save some time in post by avoiding this mistake in future. Or by using a matte box. The lens hood just wasn’t enough.
- Fusion is very picky about file formats. Uncompressed TIFFs are way faster than Quicktime + Cineform.
- Mocha Pro is very worth it.

New site at blog.bnjmn.id. I will continue to have fun on Twitter for as long as the site is tolerable but containing the shitposts to that site, and serious posts will go to the new one. Posts on the new site will be mirrored on the Twitter feed for now.
Panasonic Lumix S5 4K Original Sample Footage Download
Whenever shopping for a camera or evaluating one for a particular project, I believe it’s important to view footage from that camera locally on one’s editing computer, to evaluate image quality, compatibility, and editing performance. Sample footage of this quality is difficult to find. With the exception of Blackmagic, no major prosumer camera maker provides sample footage for download.
In the case of the S5, I found sample footage hard to find, but especially captured internally. Most samples I’ve seen were recorded with an external raw recorder like the Atomos Ninja V or Blackmagic Video Assist 12G, which are capable of capturing extremely crisp 24MP 6K frames using the full resolution of the sensor. Those recorders make this camera extremely adept for micro-budget filmography. But they also increase the total cost of ownership by 25-75 percent compared to the body alone, and of course add bulk unsuitable for casual carry. If owning or renting one of those recorders for your productions is not an option, these sample clips are for you.
All of the clips on this page were captured internally and not modified whatsoever between capture and upload.
By downloading these clips, you are accepting a license hereby granted to you to use them according to these terms: You may use these clips ONLY for personal use. You may redistribute them online, but ONLY if you change, edit, or remix them in an artistically-significant way, AND the distribution is noncommercial in nature, AND you link back to this page. For example, this means you may arrange them in your own edits with colour changes or the addition of music, and publish those edits on the internet, as long as your use is noncommercial, and you link to this page in the video description. This license does not give you the right to redistribute these clips offline or commercially. For any other use or if you’re unsure if your use aligns with this license, please email me (mail ‘att’ benmacphail.ca).
Right-click on the links to save these clips.
Clip 1 (Sunset) — 0.5GB, V-log, ISO 640, 4K 4:2:2 AVC @ 150Mbps — Taken with a rather soft Sony 30mm f/2.8 Macro lens, so this clip is probably best used to evaluate colour more than sharpness.
Clip 2 (River) — 0.2GB, V-log, ISO 640, 4K 4:2:2 AVC @ 150Mbps, Sigma 45mm f2.8 DG DN
Clip 3 (River) — 0.2GB, V-log, ISO 640, 4K 4:2:2 AVC @ 150Mbps, Sigma 45mm f2.8 DG DN
Clip 4 (River) — 0.3GB, V-log, ISO 640, 4K 4:2:2 AVC @ 150Mbps, Sigma 45mm f2.8 DG DN
This page will update as I release new sample clips.
Sony A7S III 4K Original Sample Footage Download
Whenever shopping for a camera or evaluating one for a particular project, I believe it’s important to view footage from that camera locally on one’s editing computer, to evaluate image quality, compatibility, and editing performance. I’ve found that sample footage of this quality is difficult to find. With the exception of Blackmagic, no major prosumer camera maker provides sample footage for download.
So I’m uploading some footage shot for my student film with the A7S III for download. This is the original footage with no re-encoding, shot at UHD 29.97p 10-bit 4:2:2 ALL-I with the H.264 codec at 300Mbps. I’m pretty sure I had digital (“Active”) stabilization enabled in clips #1-3, and I think I turned it off for #4. I used the Sony 24-105mm f4 G lens for all of these shots. I’ve stripped metadata with ffmpeg for privacy, which required converting the audio streams from PCM to AAC (degrading audio quality somewhat), but the video streams were copied exactly.
Right-click on the links to save these clips.
Clip 1 (1.0GB, S-log2, overcast daylight)
Clip 3, (1.0GB, S-log2, overcast daylight)
Clip 4, (1.0GB, ‘Standard’, honestly no clue what ISO anymore)
You may use these clips ONLY for personal use in evaluating the Sony A7S III’s image quality.
If you are looking for my post about iMac thermal throttling, it is preserved here.